So, you’ve just got home from an intense jacuzzi & sauna session at the spa or from sweating in the sauna of your best friend, and you have made up your mind to enjoy that marvelous experience whenever you want, from the comfort of your home. You have decided that it is time to build your own sauna.
But you’re probably wondering: “How will I ever be able to accomplish this?”
How realistic is your goal to build a sauna? Well, it might take some time and it might require some extra effort from your side, but the great news is that building your own DIY sauna is an achievable task. The biggest obstacle is just getting started with it. After you get rolling, nothing in the whole world could stop you.
If you really want to enjoy that marvelous “steamy” experience that only a sauna can offer, you have landed on the right page. We will teach you how to build a sauna from the scratch without wasting any extra time or money.
After your sauna is ready, you might even be able to monetize it. People love saunas, and they definitely appreciate their peers who had the gut of making their own DIY sauna. You might even build your own sauna business in the future, but that’s another story altogether.
Without further ado, here is how you can build your own sauna right inside or near your home.
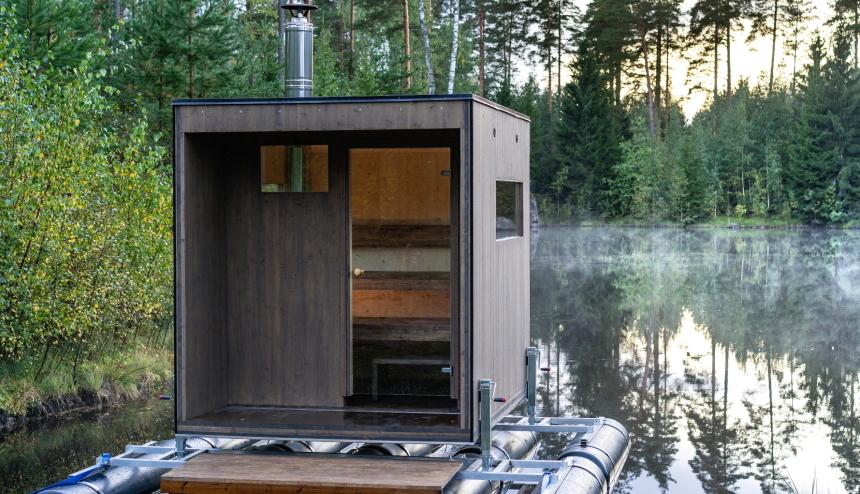
Probably the most important aspect of building a sauna is thinking of where to put it. The spot you ultimately pick for your sauna could change all the rules of the game.
Are you willing to build an off-grid sauna that is not connected to anything? Would you go with a barrel design? Do you want to transform your shed into a sauna? Or maybe build it into a corner of your living room?
When it comes to picking a location for your sauna, the possibilities are endless. That’s why it is paramount to think twice before selecting the right location. If you want to benefit of the “cozy” factor, you want to build the sauna as close as possible to your home. It is incredibly easy to drop your clothes on the bed and simply “jump” into the sauna in the other room.
On the other hand, if you want to enjoy a spectacular view and you love to experience the “thrill” of solitude, you might want to build your sauna in a remote location that benefits of a special view. A seashore, for example.
No matter where you choose to build your sauna, it is important to consider the following factors:
If you choose to build an outdoor sauna, make sure that your municipality allows sauna construction projects. Check for any permits needed and ensure that you have all the approvals needed. Moreover, make sure that you follow all the safety measures and that the sauna is certified by a specialist.
 Choosing the right materials for your sauna is also paramount to the success of the project. Now, here is what you will need:
Now, when it comes to choosing the heating method of your sauna, you can go either with infrared heating or lava rocks. While the latter
is cheaper and more traditional, infrared heating is “trendier”.
We personally advise you to go with a premium option, such as the JNH Lifestyles Joyous or MAXXUS Dynamic Barcelona DYN-6106-01. These infrared fiber heaters are FSC certified, offer astounding insulation and even come with built-in premium speakers.
It is crazy how easy building a sauna is. You can’t even imagine how fast you can build your own DIY sauna. After you pick the right location and assemble all the materials, you can complete the whole project in a matter of days.
Here are the main steps for building a sauna:
If you choose to transform one of your rooms or half of the room into a sauna, you can skip this step. You probably already have a non-permeable, solid floor in place. However, if you choose to build an exterior sauna, you have to start by leveling the ground.
For foundation, you have several choices, out of which wood and concrete are the best. While concrete is rot-resistant, durable and quite easy to get, wood is inexpensive and very easy to install. Plus, wood gives you that feel of uniformity and cohesiveness of traditional saunas.
You can also go with class 5 gravel, which is very easy to level and excellent at shedding water run-off.
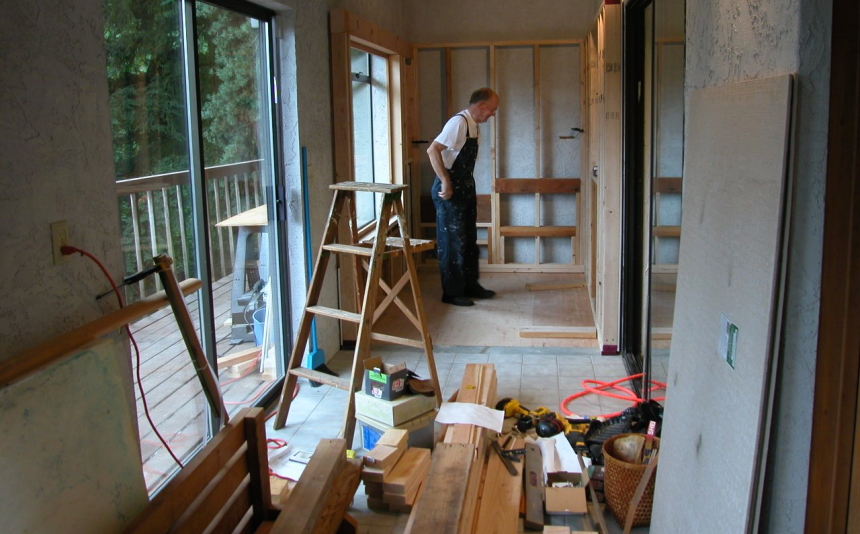
You won’t be able to build your own sauna with your bare hands. That is a no-brainer. You need the best equipment you can get your hands on. Picture this: trying to fasten boards together with only an old hammer and some nails.
To be successful in your endeavor, you need a powerful nail gun, a compressor and a drill motor. You also need a sturdy table, a jigsaw or a skill saw.
Now, this is where the fun begins. If you want to build an outdoor sauna, you need to follow a blueprint for fastening the boards together. If you have experience in carpentry, this could be quite easy. If not, bring a friend or two with you who have experience and do this fun project together.
Begin on one side of the ceiling and start to nail the cedar panels together. As a rule of thumb, you want to add a layer of panels, then put the insulation in between and then add an extra layer of boards. If you are building an indoor sauna, you can only add one row of panels on the interior of the insulation, with the insulation close to the exterior wall.

This might be trickier, but don’t worry. No one was born a “master of insulating” saunas. When choosing the insulation material, try not to go cheap. Less expensive insulation materials such as foam boards will prevent moisture from passing through the boards, ultimately leading to a moldy sauna. Fiberglass insulation is a good solution that acts both as a vapour & heat escape barrier.
An environmentally-friendlier alternative to fiberglass insulation is recycled cotton insulation. Instead of being composed of glass shards, which are unhealthy for your body, this modern type of insulation is made of shredded blue jeans.
Add a foil vapour barrier to absorb the vapour and add an extra element of protection from the cold outside.
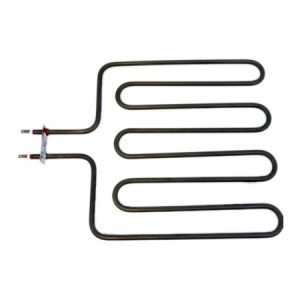 The heating element is the most important part of your sauna.
Seriously, how can you enjoy the perks of owning a sauna if you have a low-quality element?
While I do recommend infrared heating elements such as those found in the JNH saunas, you can go with an ol’ good wood heating element. However, if you choose to go with the wood heating, you might need to build a chimney. This comes with additional local regulations. That is why I don’t recommend it.
If you don’t want to go with the modern option of infrared sauna, I advise you to choose an electric heater instead. You can see them in hotels all across the United States. Being very cheap to run and extremely clean, these heaters can easily heat up the stones. There is no need to tend to a fire or build a chimney.
Depending on your needs, expect to pay between $100 and $500 for a powerful electric heater.
Mounting the heater might be tricky. If you are unable to follow the manufacturer’s instructions, I advise you to place it near the door, at around 10 inches above the ground. Consider adding a guardrail, especially if the sauna is quite small. You want to prevent any potential accidents or burns from happening.
You’ve been waiting for this step, haven’t you? At this point, your sauna project is almost completed. All is left is adding the rocks, setting the benches, mounting the door and voila – your sauna is ready to be used.
After buying the rocks (make sure you get the best volcanic rocks out there), wash them thoroughly and place them inside or beneath the heating element. Again, follow the instructions from the manufacturer of your heating elements.
This is where your sawing skills come into play. You might want to follow an installation guide, or you can just grab a couple of friends and have fun together.
As a rule of thumb, there is a low and a high bench, You can make the low bench double in width, so it enables people to sit on the high bench while keeping their feet on the low one.
Make the benches sturdy enough to support at least one person more than you want the sauna to accommodate. In case the maximum weight is exceeded, you don’t want anyone to ruin your nice sauna.
As for the door, I recommend you to buy a pre-built cedar door that comes with a frame already set in place. Make sure the hinges are sturdy enough and can withstand high heat without melting.
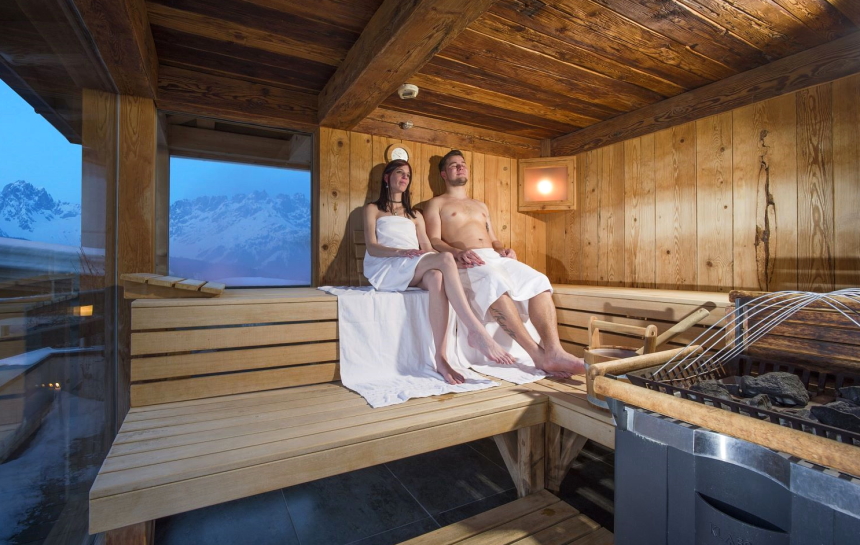
Now that everything is ready, you only need to do one more thing to enjoy your new sauna – install the lighting. Unless you want to enjoy a light-free environment, or you have lights outdoor the sauna and you want to skip this step, you are free to do so.
Installing basic lighting is not such a tedious task. If you want to be environmentally friendly or you are simply off-grid, you can capitalize on your solar system or wind turbine. For standard lighting, either ask for advice from an electrician or try to do the project on your own, following a precise lighting installation guide.
Now your sauna is ready. You can finally unwind and relax just like you’ve ever wanted.
But why not make your experience extraordinary? Why not take things to the next level?
Here are some clever accessories that can help you make the most out of your time spent in the sauna:
 Salt lamps: amazing for enhancing the ambiance inside the sauna. They can also enhance your immune system and boost the serotonin levels
Now that you know how to build a sauna, it is time to begin this DIY project and reap the rewards of having your own sauna. With so many benefits for both your body and mind, a sauna can dramatically improve your wellbeing.
Best of all, you can relax right from the comfort of your home, if you choose to transform a room into a big sauna. Start this project today and leverage all the astounding benefits a sauna can offer.


Of course, what a splendid website and educative posts, I will bookmark your website.All the Best!